
For School Management assistance, please see the support videos and frequently asked questions below. Or, refer to the aceconnect School Management User Guide (English, revised 2024) or the aceconnect School Management User Guide (Spanish, revised 2020).
Note: aceconnect® School Management is continually being updated. Some variation in operation from the version used when these videos were created and the most recent version may occur.
Yes. While not necessary, a second admin account in the School Management system will allow access to the software if the first admin forgets his password. If no admin can access the software, you will need to call technical support for assistance in adding one.
If you have attempted to log in but cannot, the software will provide one of several messages about the reason.
Error: Could not log in: User is locked out or Error: Invalid username or password.
If you receive an error message that states the user is locked out, or that the credentials are not valid, you will need to rely on a second admin to access the software or call Technical Support at 615-612-5288. It is important to have at least two admin accounts. If you have a second admin, contact that person and gain access through that account. If you are the only admin, account recovery is still possible, but the solution can be technical. For this reason, contacting Technical Support is the best option.
Error: The server is running a different version ______. This is version ______. Please install the correct version or update and try again.
To fix this, ensure all PCs with the School Management system are using the same version by running the installer for the latest version. (Make the appropriate Select Packages choice for each PC.) You can download the installer for the latest version from the Licenses section when you log into the School Management Portal.
Error: Could not log in because the server is not available or the network is down. or Error: Could not login: An error occurred when verifying security for the message.
This message appears when the installed School Management Software cannot communicate with the installed server. This could occur on the main computer where the server is located or on another computer where only the client software is installed. (Please refer to Chapter 2 of the aceconnect School Management User Guide for a thorough explanation of the installation process, the server, and the client computers.)
To resolve the error on your main (SMS Server) PC, first check that the server processes are running in the background. In the Windows search, type services and open the Services app that it finds.
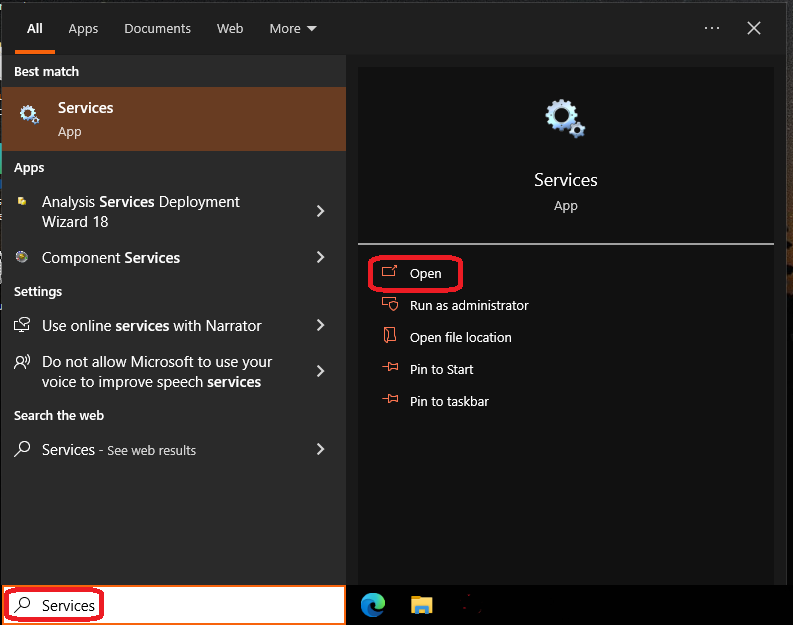
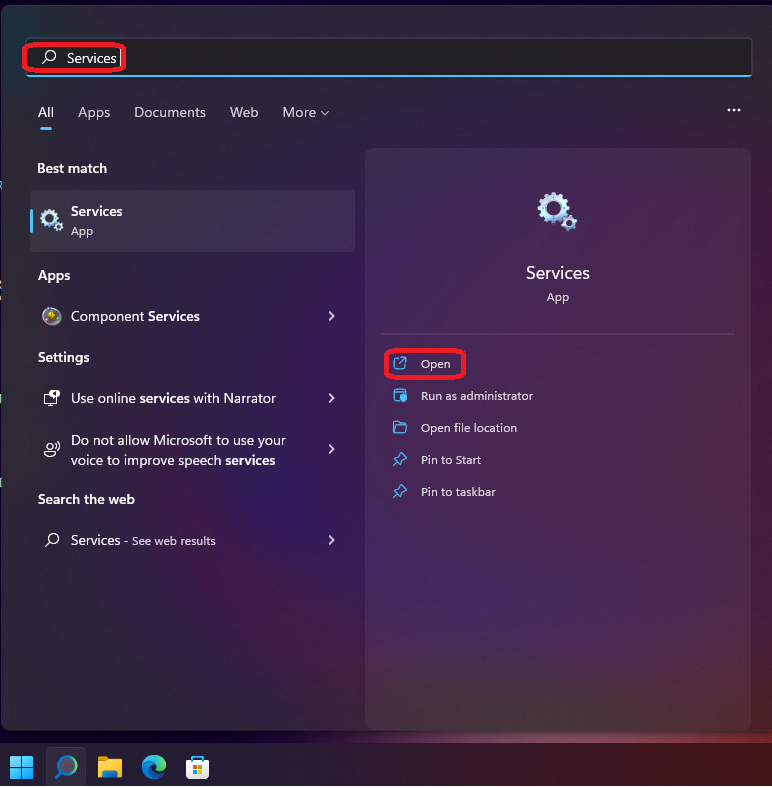
In the Services window that opens, find and start two processes in this order: SQL Server (SMS2) and School Management Service. Make sure they have the status of Running. If one is not running, click to highlight that line and click the option to "Start the service." When both services say running, try the School Management login again. 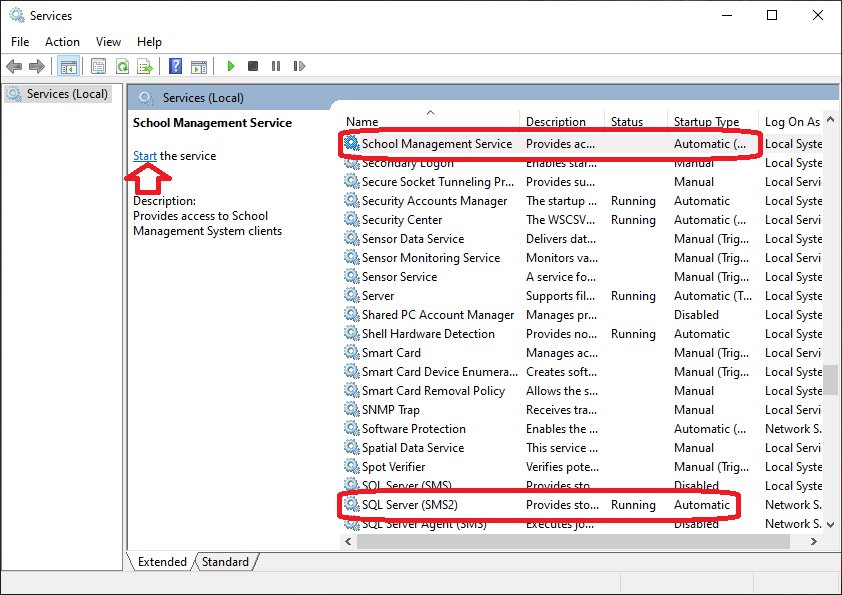
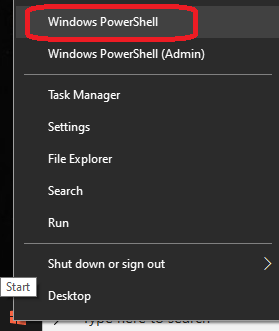
If the error message persists, right-click the Windows logo for Start on your main (SMS Server) PC and choose Windows PowerShell or Windows Terminal from the menu. In the window that opens, type in ipconfig and press Enter. The Windows IP Configuration should appear. Find the line that states IPv4 Address and note the address to the right of the colon. Enter this IPv4 address into the School Management - Login’s Server field as you try to log in once more.
.png)
.png)
All subjects used in the Kindergarten with Ace and Christi program can be found in the Reading Development list. On Students>Progress Control, click + New Subject and select Subject Type as Reading Development to find the kindergarten subjects to place those PACE scoreboxes on the screen. 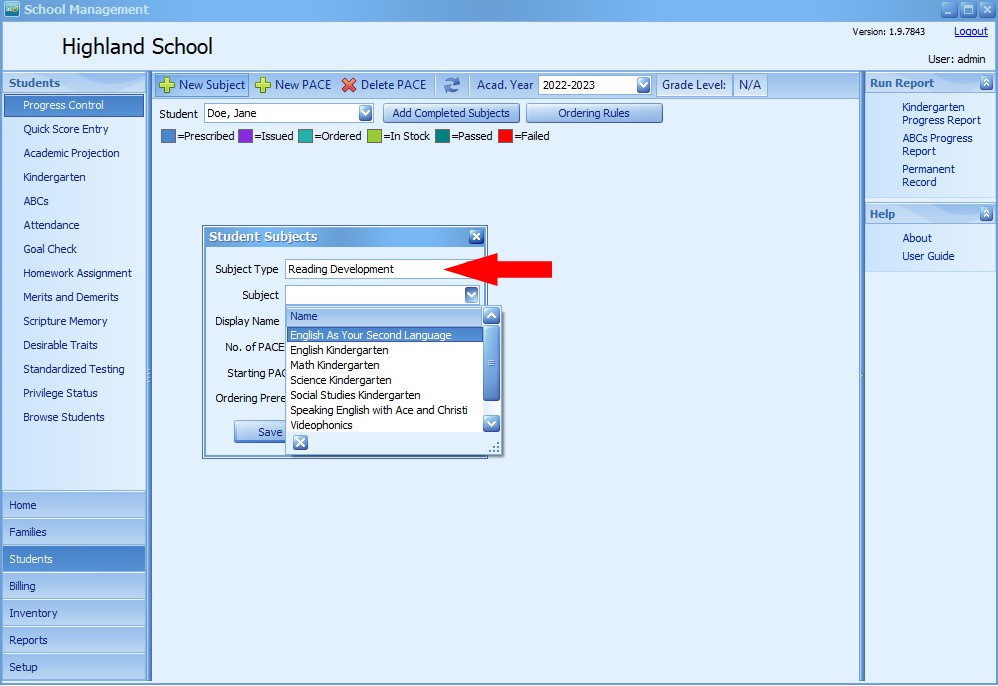
When changes are made in the Setup section, refreshing or restarting the application is sometimes required for newly input information to take effect for all the sections. To refresh the screen with the current settings, click the refresh button at the top. 
The software is designed to receive one score per completed PACE. Since user-added subjects do not have a PACE, the term PACE/Unit reflects one score that needs to be entered. If a subject will have four scores (one for each quarter on the Progress Report), enter the number 4 for the PACEs/Units. (Note: Unchecking "Is PACE?" for an added subject disconnects its score boxes from Inventory tracking.)
The High School Transcript reports in School Management include subjects for which the student has earned high school credit. The system awards high school credit for completed Graduation Requirement subjects. If subjects are not showing up on a High School Transcript report when you believe they should, most often it is for one of these two reasons:
In a few instances in previous versions of the software, High School Transcript reports appeared to show an inaccurate number of academic credits when printing for multiple students at one time. If this has occurred, update the software and attempt the printing again. If unable to update the software, call customer technical support.
User-added subjects must be entered into the Course of Study before they are copied to the Graduation Requirements or added to a student’s Completed Subjects in Progress Control. If user-added subjects are not displaying on transcripts, take the following steps.
First go to Progress Control and take notes of the scores for all the student’s user-added subjects. Then delete the user-added subject scores one-by-one until they are completely removed from the student’s Progress Control. 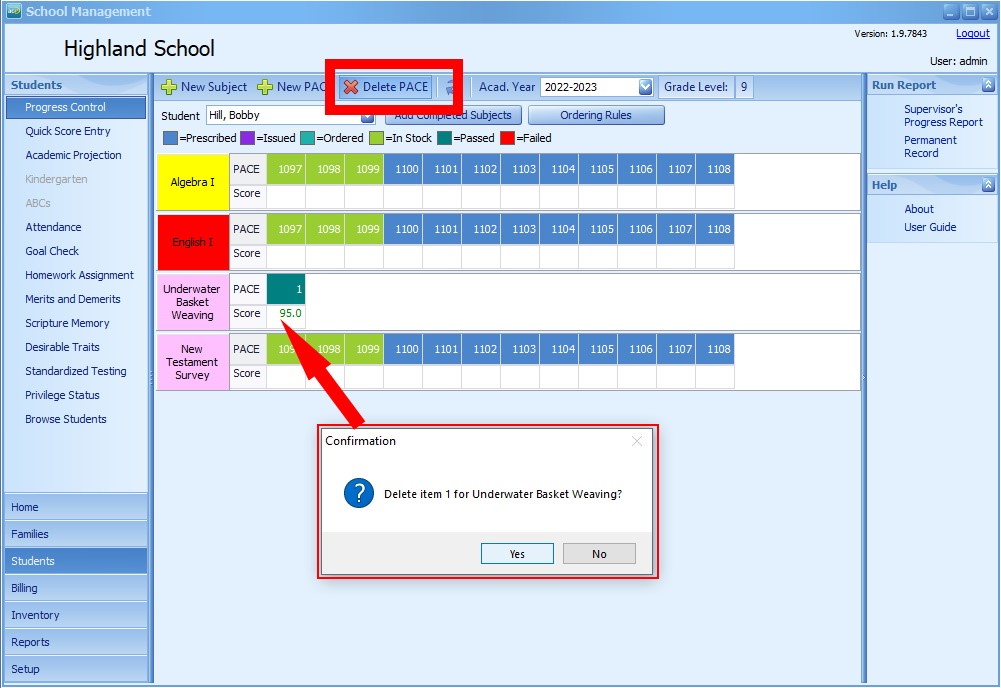
Then go to Academic Projection and remove all the subjects from the Graduation Requirements. 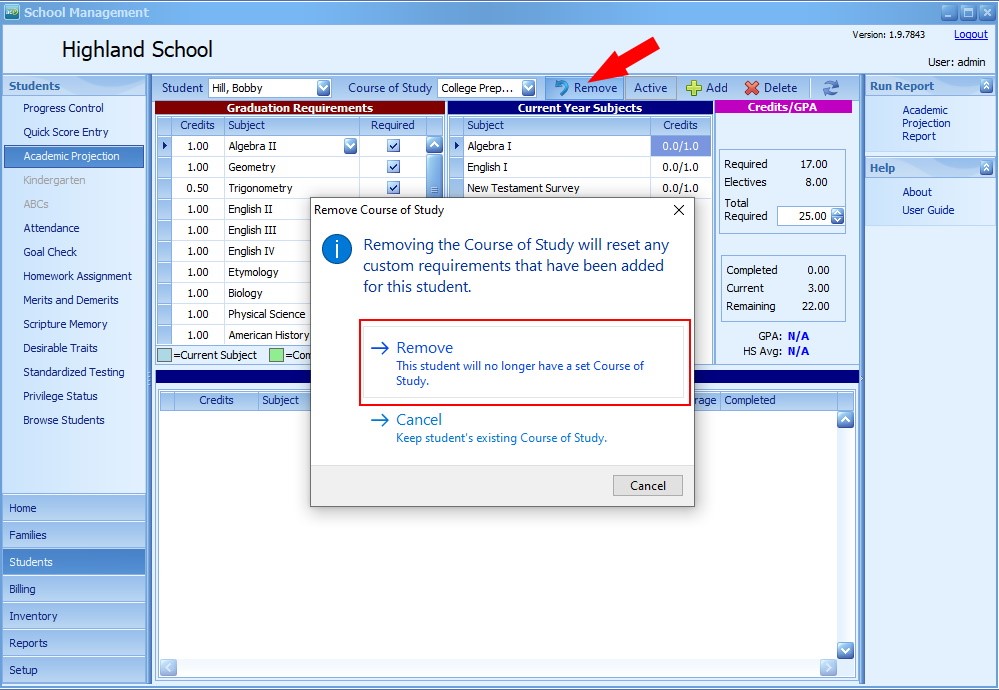
After that, go to Setup > Course of Study and add the subject you would like to display on the transcript (if you did not do so previously). Add that course of study to the Graduation Requirements, then add that Completed Subject to the student’s Project Control.
Student and primary person profiles are distinct, yet connected through family relationships. Each person’s profile has a space for contact information. In the case of the Permanent Record report, please note that the address on the report belongs to the primary person (parent/guardian) to whom that student is assigned. To ensure that every student is created with a relationship to a primary person, use the New Family Wizard. If updating a family relationship, this can be done by editing the Relationship information in the student profile.
Yes. This is part of the Set as Current process for a newly created academic year.
First, it is best to finish all the data entry for the previous year and create a backup of the database before clicking Set as Current for a new academic year. There is only one opportunity to reenroll returning students as a group and bring incomplete records forward. On the Setup > Academic Year screen, create the new academic year and enter the settings from top to bottom. With the new academic year selected in the list at the top, click Set as Current. A notification box will appear asking to reenroll returning students. After saving the Reenrollment of students, you will be asked to bring records forward from the previous year. Since this is the only time this can happen within the software, it is vital to choose Move all Incomplete Subject Items. This will bring forward the score boxes of those PACEs/Units that did not have a score from the previous academic year. 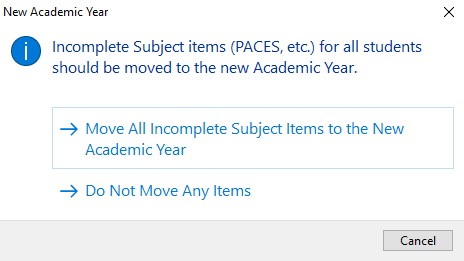
Yes. When initially sending an order, there are options to Print, Save to File, or Send Now. After choosing one of those options, it is impossible to print from the Edit Order window. However, it is always possible to go back to your orders list and click Print.
A newly installed copy of the software must have the school’s license downloaded onto the new PC. Enter your school’s Portal User Name and Portal password at Home > License. This will allow the software to Download License for full functionality with the next login.
When attempting to download a license in the software on the Home > License screen, the Portal Account Status may show one of the following errors.
This error can occur in one of several instances. If you receive this message, contact Technical Support at 615-612-5288 and give details of the actions taken prior to the error message occurring.
For additional assistance, please email [email protected] or call 615–612–5288. Technical Support is available for live support Monday-Friday 8:30 a.m.-4:30 p.m. CT.